30 December 2018

TTCombat: Freighter Ship

I've been eyeing the TT Combat cargo ship for a long time. Not really had a reason or plan for it. But after starting to play Last Days: Zombie Apocalypse, I decided to get it.

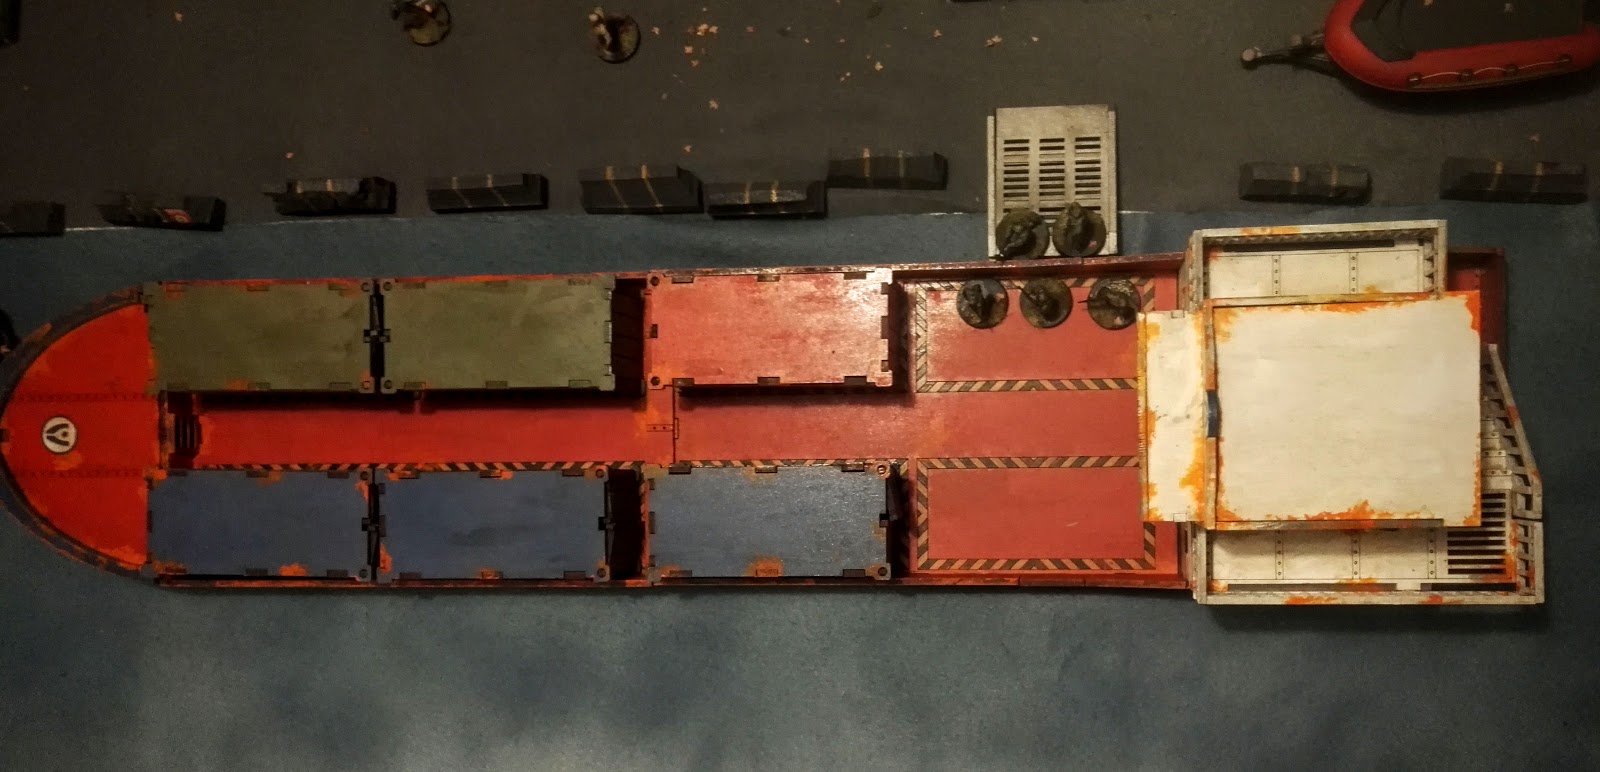
This is a huge kit, 75 cm long and perfect for a lot of scenarios. And cargo ships really fit into a lot of settings - you can even drop one into a post apocalyptic wasteland.

The MSV Ironsides kit set is excellent value (as is most TTCombat stuff really) as you also get 6 shipping containers and a nuclear weapon container (that I haven't build yet).

The bridge and cabin at the end, needs a bit of work when assembling. Keeping your head cool, you can make sure the entire top floor and house is glued together. It's not designed to be glued like this, but makes for easier taking apart during games.

Painting
As always I did most painting before assembling the kit. I did an image search for 'rusty cargo ship' both for color scheme and weathering.

On a few MDF pieces I had to use some masking tape, when priming, to secure sharp lines.

As always the entire piece have been drowned in a thick layer of quick shade varnish. It always get less visible in photos, but gives it all a grimy look.

A 3'x4' setup of an industrial harbor. Using some homemade felt mats, distribution center, shipping container and wire mesh fences. Lots of homemade stuff on this setup.


As a tribute to my good friend Mathias 'Admiral' Rizell the ship is named after him. MSV is maritime short for 'Multipurpose Supply Vessel'. It's a simple paper print that I've glued on.


With the six shipping container that comes with the ship. I'm looking forward to playing a game with this ship as a survivor base, with tents, barricades etc.


Some US Army infantrymen moving to clear the ship of zombies. Made from Mantic Mars Attacks models.


The entire is removable, it's 4Ground store accessories. Perfect height, fitting into the rooms of the ship.


The dock is made from a blue piece of felt and marked with my homemade jersey barriers


Soldiers about to make a forced entry into the ship. 


Did a quick search for various details for the walls and floor. Pictures inserted into Word and printed out in small scale. been searching for 'shipping manifest', 'shipping posters', 'clock', 'inventory manifest'. It really adds a lot to the grey walls.


"Aim for the head and not the chest!"

"... Headshots are the very best..."

"Shut the fuck up Carl!"


The bridge has some cool interior mdf details. I added a few sea charts as well, to the walls and the floor.


The 6 containers that come with the ship. I really like these. the doors open for interior play as well. And the references to other franchises are nice. Fallout and Batman references - what's not to like. Also the 'Vision Electronics' logo is also on the roof top accessories air condition vent.

And the Alliance Shipping logo is visible two places on the ship itself.


Thanks for having a look. Check out the site or the terrain hub for lots of other posts. A please consider supporting the blog by dropping a comment or following the page on Facebook or Instagram.

28 December 2018

Roman RISK: Catapult, fort, temple and lots of ships

Reinforcements have arrived from Ramshackle Games! The scale of the Roman RISK project is starting to show.

Unfortunately the stuff I sculpted myself have gotten lost in the mail - that sucks. But Curtis Fell (not all heroes wear capes) have sculpted up new models himself. Much better models that I did myself.

A big bunch of nice resin board game pieces have just gotten in - absolutely amazing stuff.  It's really hard to get a sense of how many models is enough for the game - but there sure seems to be a lot now.

The onager (a catapult) is a strogn attack weapon. Rolling a d10 on the attack, but only a d4 in defence. Expensive to build and requires some tactical sense to not be a waste of money. 

The Temple is a territory upgrade and will make that territory worth an additional point (though I might go for a 2 point increase). 


Forts are a territory upgrade and will allow the regular legionnaires to defend with a d8 (over normally a d6). Will not be painted in team colors.


Behold! The power of Rome! Ships sculpted by Mathias Rizell from Admiralty Miniatures


20 December 2018

Roman RISK: The blue team

Finally finished painting up the 1:72 models I've gotten for the blue team. I've gone for a super simple paintjob.

Base coat plate mail metal, pick out a bit of blue fabric, brown sheath and sandals, skin, dark tone wash. Painted the bases with PVA (colored green) and flocked.

Fairly quick to do - taking a lot longer than I had anticipated (and I've been too slow to get going).

This shows the complete amound of models I've sorted out for each team.

~55 infantry models - legionaries.
20 heavy cavalry - cataphracts.
2 legatus

Still to be added is some resin testudo formations by Ramshackle Games.

A big thank you to both King Games and Army Painter for donating painting supplies for the project.

Historically there weren't cataphracts in the roman army at the time of Caesars death. But these nice models were kindly donated by HaT miniatures. And since cataphracts are getting part of the roman army at around 200 bc, they'll do fine for this  project.


Legatus from a HaT miniatures Roman Command box and horses from HaT light parthian cavalry.


17 December 2018

Tutorial: New urban felt mat

I've already experimented a lot with felt mats. It's a great and really cheap way to get a lot of mats going. Having made multiple mats and smaller overlays, I can create lots of different setups. One of the pros of doing the mats myself, is everything can be made to fit together.

For the first urban mat go here and for flat felt terrain and grass mat - go here.

Materials
  • Felt (80% viscose, 20% wool)
  • Masking tape
  • Cheap spray paints
  • Magic Marker
Step 1: 
Mark out the roads with masking tape. The first time I wanted a city center. For this mat, I wanted less roads. I wanted it with room for a large industrial area, prison set up or harbor. 

I made sure one street would fit next to the other mat (allowing a 3'x6' or 3'x7' layout). Also made sure a road lead straight out the mat - for an easier going into a grass area. 


Step 2:
Paint it up! I used cheap spray cans from the hardware store. Grey on most of the board, black on the street. When dry I dusted some brown and black some places on the grey - for different nuances. Then gave parts of the street more black. 

Step 3:
Peel off the masking tape. Use a black magic marker (permanent marker) to draw on pavement on the lighter grey areas (covered before by tape). Also use the marker to add cracks in the asphalt here and there. 

Done - minimum work and another nearly free mat is all done and ready.

Storage
Easy, space saving storage with a pants hanger from Ikea.


Showcase
Here's a few regular and double setups using the new mat. Check out blog posts on all the shown stuff on the terrain hub.

A regular city setup on the new mat. 


Another city setup, this being the edge pf town. Using a small piece of green felt, to make a lighter 'end of town'.


A 3'x3' harbor setup, covering part of the new mat with a 1'x3' blue felt piece. Made room for this when I marked out streets with masking tape.


A larger harbor mat using the blue felt next to the map - for a quick 3'x4' map.


The two different urban mats put together for a 3'x6' playing area.


Notice the park on one mat. A small green piece of felt, added when a park is needed. Easily taken of for a completely grey map. 


And a 3'6' end of town setup. Using felt roads on my green mat, fitting the width of the street on the new map. 

The whole bang! Urban mat, grass mat, flat terrain: river, dirt road and asphalt road. 


Thanks for looking and please let me know what your think. The blog is all about good looking and cheap solutions. Wargaming on a budget and on a skill level for all. 

Consider dropping a like on Facebook or a follow on Instagram. It adds traction to the blog, and that adds to my fun. Cheers. 

12 December 2018

Roman RISK: First castings of the ships

Ramshackle Games have gotten the ships sculpted by Admiralty Miniatures. The ships have been now been cast in resin. I've just gotten the first examples in hand and they are bloody lovely models.

Green stuff wizards are what they are! Forming a green blob into something like this - amazing.


10 December 2018

TTCombat: Distribution Center

After playing Shadow Run: Returned on PC I wanted a storage building. It'll be good for cyberpunk games and the modern games I play. The building will also double as a 'mall' for Last Days: Zombie Apocalypse. Like a mall it can give the same bonus: lots of space and a store room.

This kit is huge! Lots of nice mdf. It also comes with some interior details like a ramp, truck, shelves and palettes.

There's not a lot of words to put on he build, it's really straight forward. The only fiddly parts is the platforms on the inside.

As always when doing mdf terrain, I sort out the pieces and spray paint them before assembly. Leaving virtually no work after assemble, a bit of details to pick out and weathering. Spraying works well as the mdf will soak up the paint in places, it gives an uneven look to the flat surfaces - instant nuances.

Decided to add a bit of detail to the large wall areas, so found some 'generic storage sign' on Google. Perfect fitting as it had the same colors as I already went with for the building itself.

Also added some details to the inside, just prints on papers. Did searches for 'shipping manifest', 'wall clock', 'calander'.


I've used a lot of Army Painter quickshade varnish on the walls. Used in excess it'll look like grime.


One wall is completely without detail, so an added sign really gives a lot to the surface.


A view from gate number 1 inside the building. The container is from the TTC cargo ship kit.


Top down view of the building. Adding a few containers on the inside will make some great firing lanes. The oil drums are toys and palettes are homemade from ice sticks. Tutorial here.


Dave never even clocked out when the apocalypse hit - he was pretty much a zombie back when he was alive.

Wade an everyday hero on the walkway, the ladder leads to the open windows on the roof.


One side of the warehouse. One ladder leading up to the walkway. The dumpster is a resin piece I got in a trade once.

The other side of the warehouse. The many different entrances does a lot for the buildings usefulness in gaming.


The front door, with a small printed paper clock on the wall and some shipping manifests on the ground


A 3'x4' setup of an industrial harbor. The mat is a homemade 3'x3' felt mat, with an added 1'x3' blue piece for water. The jersey barriers, one container, palettes and chain-link fences are all homemade. Find all the blogs on the terrain hub


A smaller 3'x3' setup on a harbor. The TTC Distribution Center really takes up a lot of space.


Thanks for looking
Cheers for checking out the blog. Let me know what you think in the comments or on Facebook or Instagram

The blog is written for my own pleasure and sense of hobby achievement. But I really value the interaction with other hobbyists.